Thursday, June 29, 2006

A clutch in a pinch?


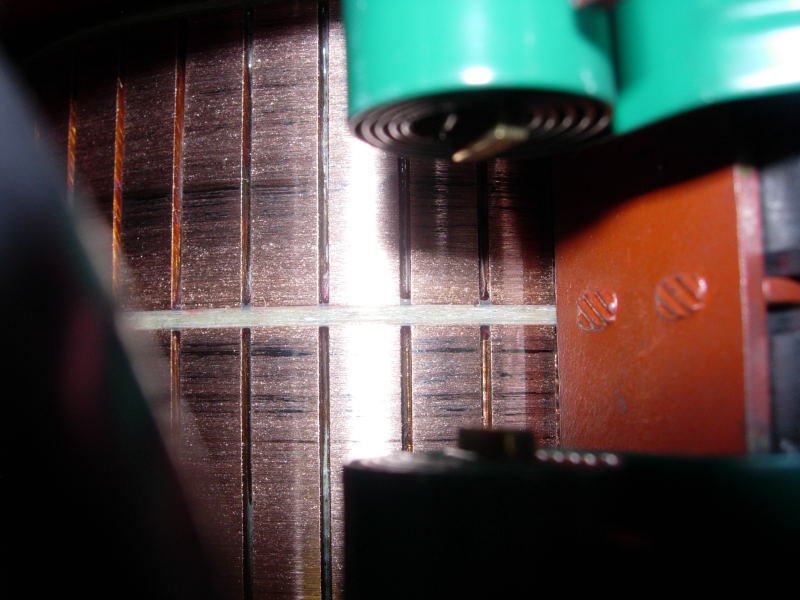
Now that the Gamera is ready for action, it comes time to finally install the taperlock hub, lightened flywheel, clutch, and pressure plate. So, with great enthusiasm and confidence I put on the hub and then the flywheel, being careful to properly position the hub on the shaft as close in as I dare, and to slowly tighten the allen screws in a crosswise pattern. Besides, taperlock hubs are self-centering by their very nature, right?
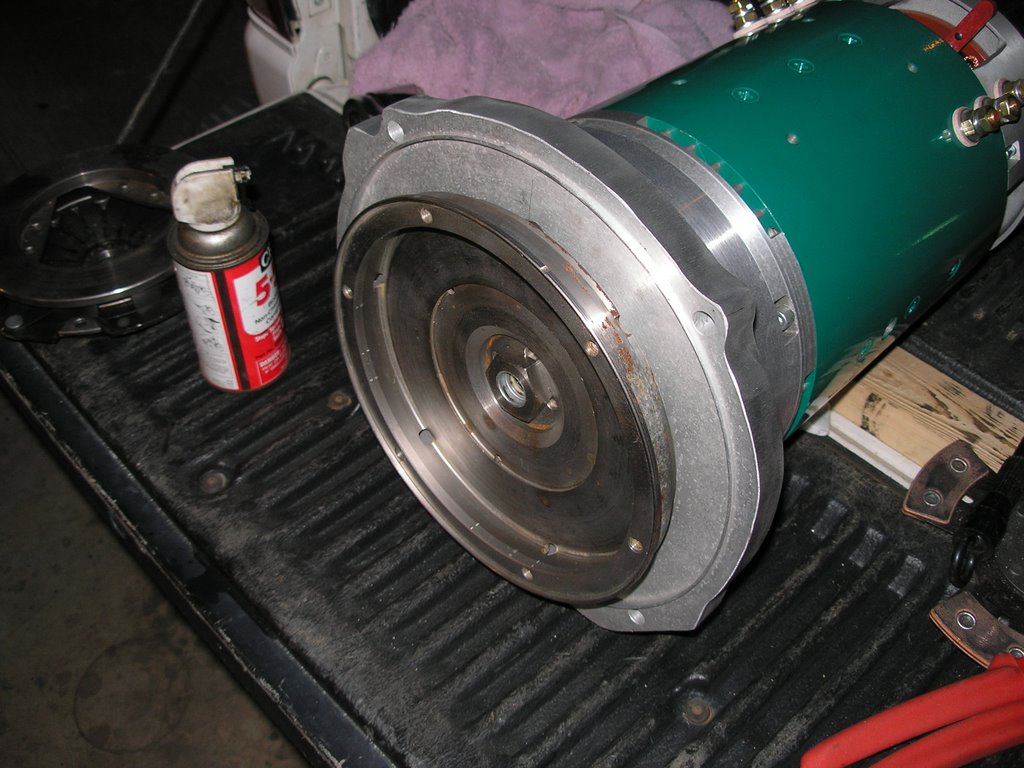
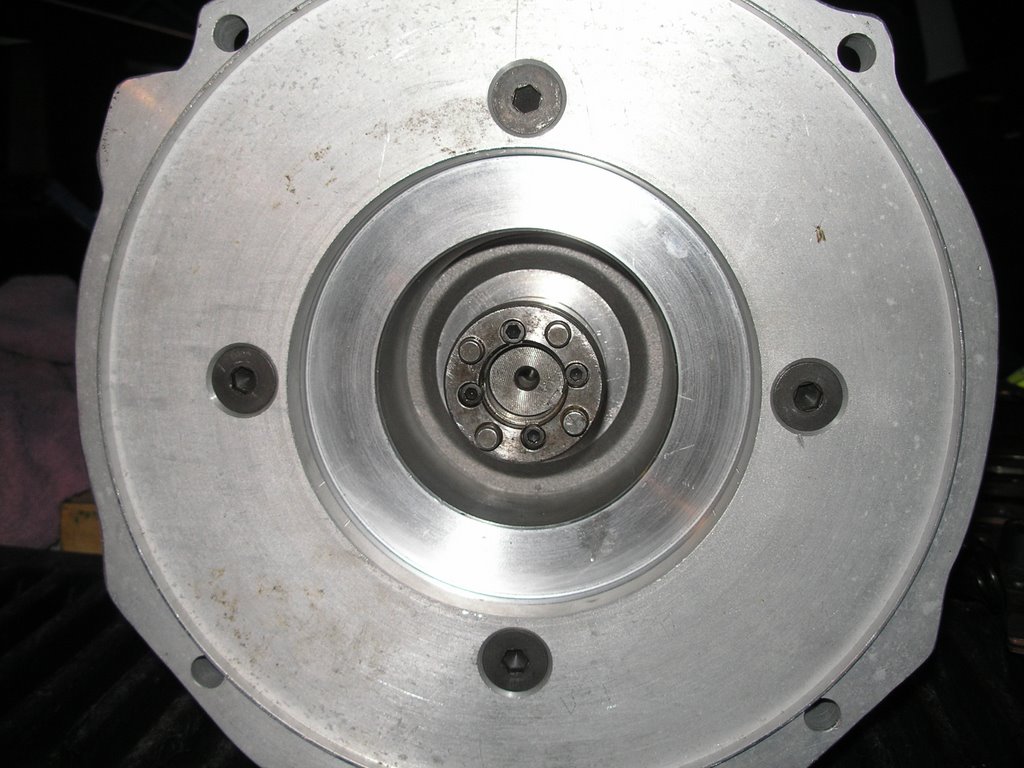
Beautiful as it may be, when the above assembly was test-spun, it wobbled like a wounded duck, so this midnight escapade ends with Gamera back on the bench, the Bentley shop manual open for study, and Bug Me Video awaiting a less bleary-eyed mechanic.

7/1 Update- With the sage advice of Jerry at Autosport International, (and the use of his air wrench) I was able to get the flywheel mounted true. Turns out that the winning technique involved remounting it a couple of times, rotating the hub 90 degrees each time, until I found the 'sweet spot' where the respective idiosynchracies were cancelled out (down to 0.002").

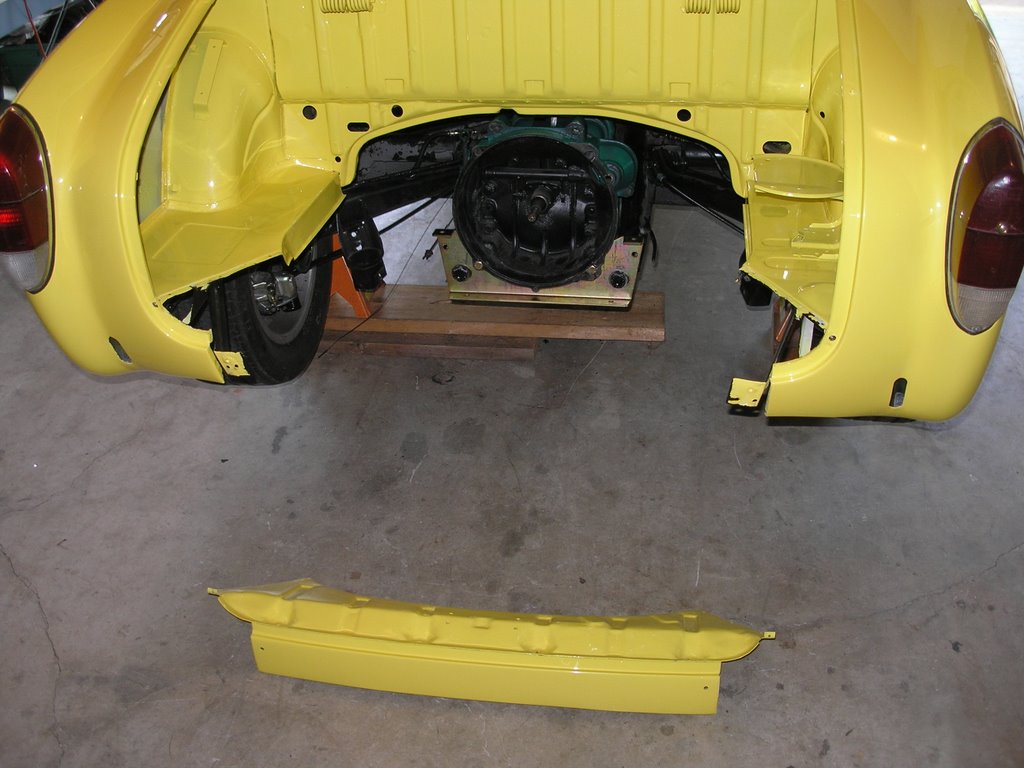
7/2 Update- But of course, solving one problem only leaves one free to find another. I've a nice stash of parts to pull from, like any aircooled enthusiast, but not the experienced eye to tell early from late clutch parts, especially with some racing and one-off versions thrown in for good measure. So, two motor installations later, I've got one mangled pressure plate, a scarred guide cone, and a non-functional clutch.. Time to go to the guru again. Besides, I need a bowden tube before that clutch will engage smoothly, even if I manage to escape without buying another throwout bearing, pressure plate, or clutch disk..

Wednesday, June 28, 2006

Gamera gets back into the game..

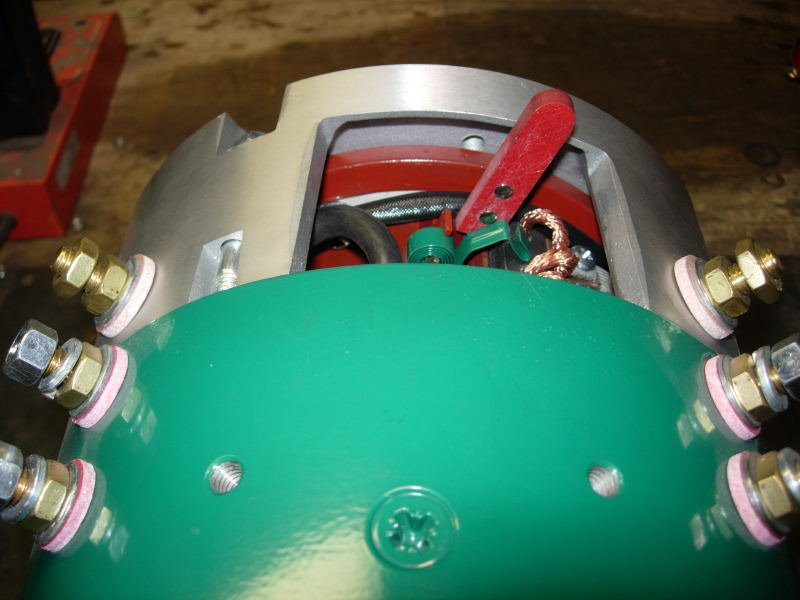
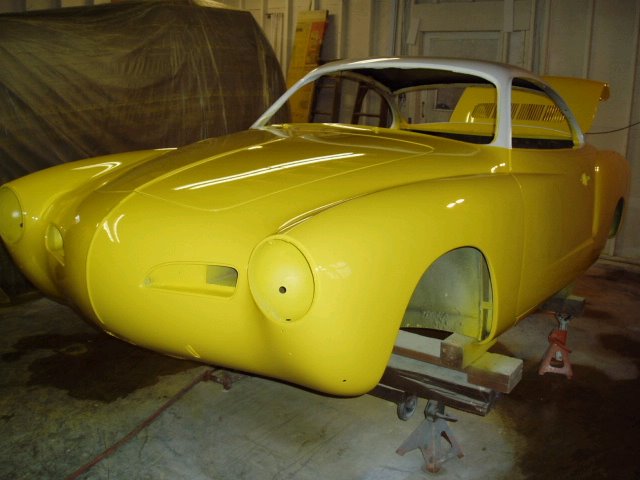
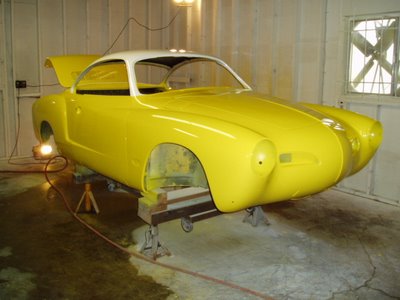
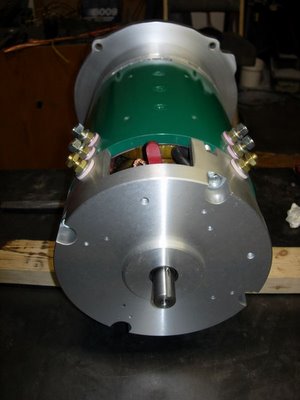
When we last saw the Gamera Nine motor, it was winging it's way back to Jim Husted's custom motor shop on the Wayland Express: a free motor delivery service courtesy of Plasma Boy's good graces. Note to self- when taking advantage of the generous services of a fellow finickey hobbyist, make sure to brief him on any pre-existing conditions present on the package. You see, I forgot to tell John that I had put a nasty scratch in the motor's fresh finish when my jack slipped during a test installation. When Plasma Boy noticed this mark a day later, he about let his own smoke out, and confessed his apparent crime to Jim, who knew about the scratch and had a good laugh at John's expense! John, I owe you one.

Since the body was not expected back anytime soon, Jimbo had full clearance to keep this project on the back burner, and sure enough, between then and now, he's refined his art even further, having seen several other suicidal EV'ers torture their motors before me. So this time, the Gamera comes back with not just the planned high-speed balancing job, but also a kevlar-wrapped commutator! After seeing the disastrous impact of involuntarily high rpms on com bars (they try to fly), Jim came up with a great technique to tie them down by machining a groove in-between the brush contact areas, and wrapping in some super-duty kevlar thread. (So the com gets baked, again.)
I finally consented to cutting off all that extra tailshaft, so now Gamera's stinger is no more than standard ADC spec. However, besides the aforementioned, additional extra touches include zilla green powdercoated springs, teflon-insulated heavy duty brush leads, and the Gen III Variable Brush Ring Assembly (now with fewer conductive components!). Instead of a wrapped steel handle and pointer, the Gamera now sticks out it's tongue, a fine red resin paddle, which will much more easily accept a control cable in the future.

Wednesday, June 21, 2006

Karmann Eclectric: the Convertible?

No, I didn't lose my top, but we did loosen the rear.
In order to greatly simplify the installation and servicing of my motor, and to leave open as many future options as possible, the Karmann Eclectric was reworked with a removable rear valence. Now, a removed rear valence is often seen on drag racing VWs, since it simplifies engine removal (which is a fairly frequent task on these ICE beasts), but usually looks like a hack job. In the Eclectric, it allows me to more easily install the motor, and to do so with a minimum of scarring. (all other EV Ghias thus far have had to cut a notch out of the motor decking...)
And besides, you never know if I might want to upgrade to a bigger motor someday, say a Kostov, or EVen a Warp Thirteen! Then I could just leave the valence panel off and have a big honkin motor sticking out the rear....

Seeing Green

You may recall that the Gamera Nine motor was reborn in Zilla Green, in honor of the world's fastest DC EV controllers, the Zilla series of scorching silicon by Cafe Electric.
Well, since the Karmann Eclectric is all about (revisionist) history, a simple off-the shelf model wouldn't quite fit the bill. Instead, the EV Gods saw fit to bless us with a truly historic controller, Godzilla serial #003.
This device is one of Otmar's first generation controllers, handed down to the Eclectric by John Wayland. Zilla #3 powered the White Zombie to many records, including it's first 100 mph run in the quarter mile. Zilla III is rated for a battery pack of 240 volts nominal, and will pass up to 1800 amperes, when cooled by ice water! 1400 amps is it's normal duty rating. Pushed by a stiff pack of nicads, this Grandpa Godzilla should give any new model a kick in the pants. After all, if it could push that square Datsun to 100 mph, just imagine the potential of a sleek Ghia!
Thanks go out again to John Wayland.
EVers should take note that the first generation of Zilla controllers was not equipped with all of the safety features now offered, and this controller was never supported for street use. As a calculated risk, I'm using this model, but with added safety features, such as redundant contactors and a rev limiter, so that I can hit the clutch without hesitation (due to a fear of motor grenading), should the controller ever fail full-on.

The next greenie will be a PFC-20 battery charger by Manzanita Micro. This unit, #33, also has a history, purchased by an EV pioneer who never abandoned the old ways, and didn't get around to using it! PFC #33 will soon be pumping up to 4400 watts into my pack.


The last, and shiniest device on today's tour is the Ghia Monster Transaxle, finally at home in Karmann Eclectric. It arrived from it's long sleep in a drab black factory paint, and I just needed to have it all shiny, 'like them that they show in the dune buggy rags'. So, a great deal more time than originally expected was expended on sanding, polishing, masking, painting, and clearcoating, to produce one beautiful Tranny! Thanks again to Steve Marks.


Yes, I will wipe off that bit 'o green from the output flange with a bit 'o carb cleaner in order to get a perfect junction with the CV joint..

You've no doubt noticed that the controller, charger, and transaxle aren't all the same shade of green. That's right- the world's two leading DC EV electronics designers can agree on a 336 volt maximum system voltage, but not on a color of green! Come on guys! ;-p Thankfully, this gauche display will be minimized by isolating the battery charger far forward, out of sight of it's Godzilla green cousins... Though the tranny and controller look pretty close in these pics, even they turned out a bit different. You see, I planned in advance for powdercoating the Gamera in Zilla green, and ordered plenty of paint for the accessories, but the earliest Godzilla controllers were painted in a custom hue, as this was before good old Oat settled on a standard selection from the powder palette..

One must pay a price when choosing to repeat history...

Ain't it nice to be together again?


What a week of milestones! First, paint day, and now the blessed union of two disparate halves, each incapable of function without the other. That's correct; the body has rejoined the pan, or to those uninitiated into the Church of Volkswagenism, the chassis.

Now, after three years of forced separation, it's understandable that these two may have grown apart. After all, his dirty bottom was cut out and replaced with something altogether different, and her beautiful curves have been massaged to better-than-original specs (and yes, we even accentuated her pecs). You see, the original pan had oblong mounting holes, to allow for plenty of wiggle room as the two came together, but I've yet to learn how to drill an oval hole through 1.25 inches of square steel. Despite our best efforts, a few of the holes didn't line up an all three axes at once. So, picture this author beneath the car, reaming out the topside of many holes from below with his trusty Dremel tool, in order for the pan bolts to find their way home..

Well, it took all day, but never have I seen a prettier pan..

Sunday, June 11, 2006

In Living Color

That's right, the long-awaited Paint Day has come! After nearly six months of stripping, cutting, welding, filling, curing, filling, sanding, curing, waiting, sanding, priming, block sanding, re-priming, reblocking, and re-priming, the car got into color! And not just any color, but a custom pearl two-tone! Enuf said, I'll let the photos speak for themselves, with the one qualifier that these photos show a bit of orange peel because the paint was still wet and hasn't had a final color-sanding and buffing yet.
Here's a little before and after for your perusal..


Lastly, these photos don't do the Pearl job justice, so here's a closeup...

Saturday, June 10, 2006

A Rehung Rear

Okay, I'll admit that it took a little while to recover from the shock of my failed suspension adaptation, but not two months! Sorry for the long absence. Going back to stock appears to be more appropriate for the Karmann Eclectric. Type I trailing arms coupled with Type IV (Porsche 944) torsion bars CV joints, drive and stub axles should do just fine for handling my load, and will also leave open additional possibilities for easier installation of traction control devices, etc...
To add some stopping power, the AC Industries rear disc brake kit was selected. This gave the additional bonus of beefy blank rotors, in which I drilled both the 4x130mm VW lug pattern, and the 5x130mm Porsche pattern, allowing me to switch rims with ease. The AC Industries kit uses commonly-available VW Golf brake parts, and seems quite well engineered. It also appears to have added just a bit of track, as I can now fit the 15" phone dials on the rear without having to modify the shock tower! With 205/50 R16 tires, it appears that I'll be able to fit the 16" rims by only trimming about 1/4" from the top bumpstop, and replacing one bolt on the trailing arm with a countersunk allen-head machine screw. Of course, the proof will be in finding and fitting one of those tires some time in the next few days..